Rip's Tips - Gadgets      

Other tip pages:   general comments  |  rigging  |  settling in  |  fixing stuff  |  gadgets  |  discussion

This particular tip page highlights different gadgets I've found useful with my '99 Triton TR21 and Mercury 225 or asks if anyone knows of an idea that improves a particular feature...


photo - transducer saver

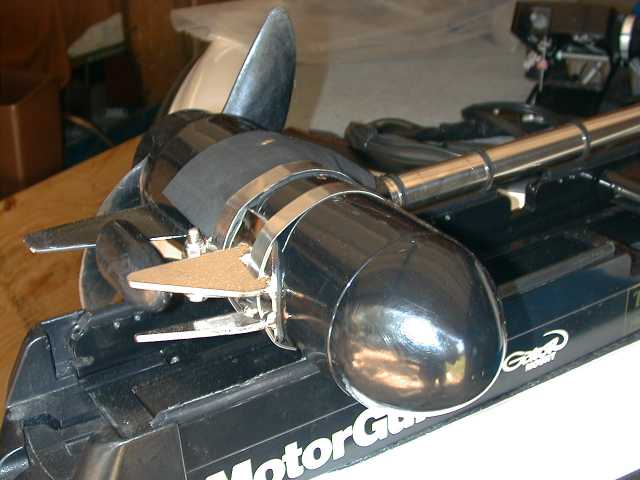
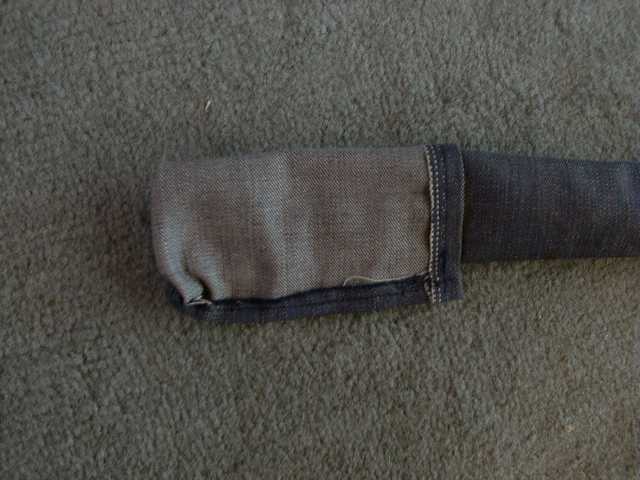
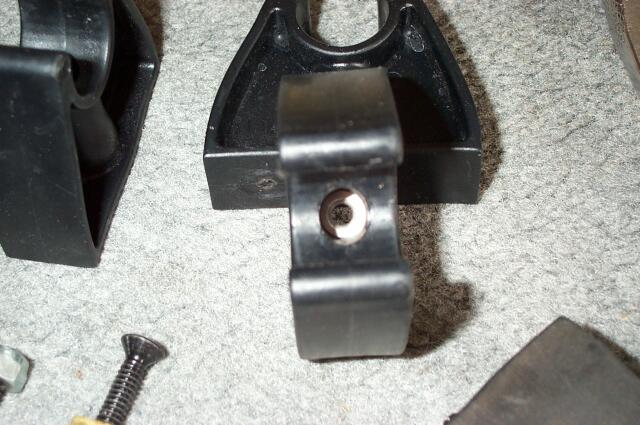
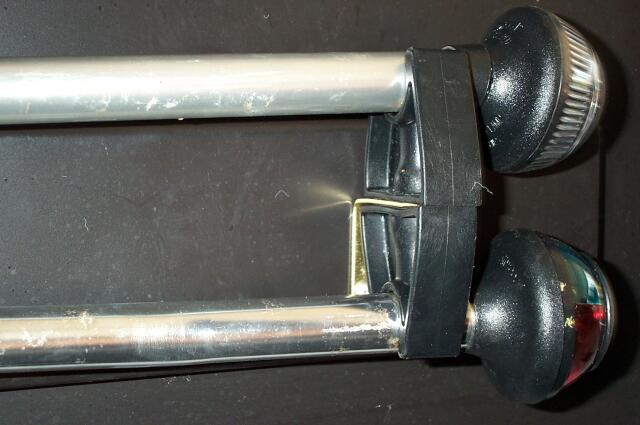
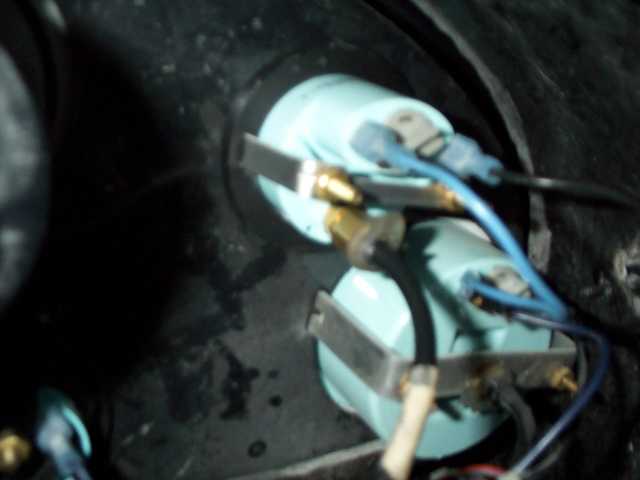
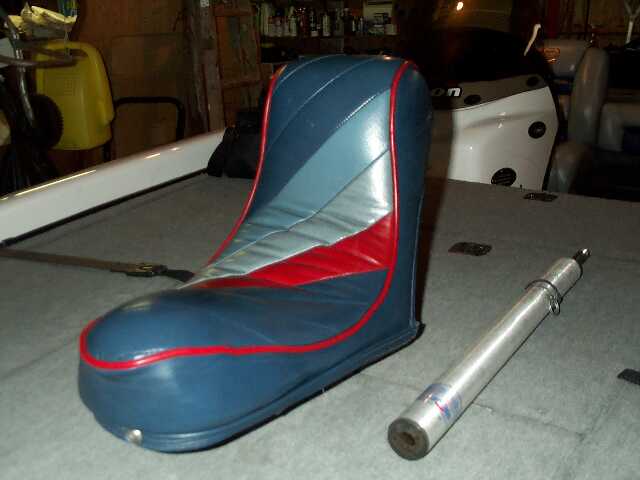
above - TransducerSaver mounted on a MotorGuide

remember, click any image for larger view

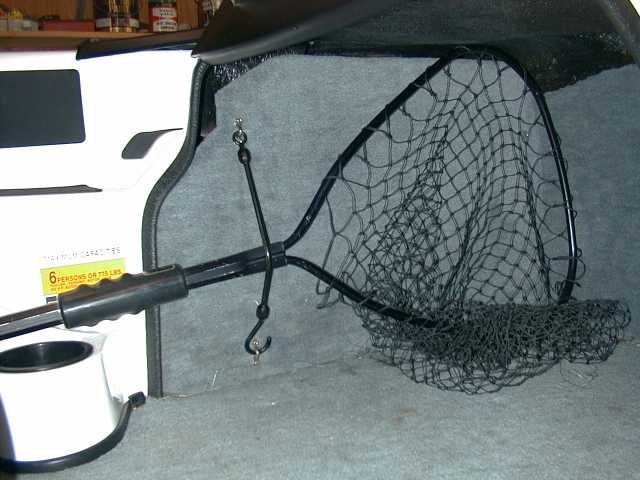
Tip: Transducer Protector - I purchased a TransducerSaver from an entrepreneur Russell Harrod in Conroe, Texas. I have not been able to reach him for several years now.

He made two-fin and three-fin protectors.

I installed a special one with two protection fins designed to fit my year model MotorGuide and adapted to mount a Lowrance skimmer-style transducer.


Update - I place a small patch of rubber from a tire inner tube under it for cushion and grip. I also attach a flap of rubber along the side of my trolling motor to shield my transducer wire from impacts too. The clamp holds the side patch of inner tube rubber in place so it simply flaps snugly over the wire. Click on picture for larger view.

This has been a very good product for me ever since I purchased it in '99, well worth what I paid for it. My trolling motor looks like it's been in a war zone. The stainless protector looks new like I just installed it. Without it, my transducer would likely be scrap on a west Texas rocky point or an east Texas stump.

I found a similar product (not stainless) during recent boat shows or BASS Classics from a company called Innovative Angler http://www.innovative-angler.com/ and I picked up several of these as gifts for friends. No complaints on these over the years, just compliments and thank you's.

fish icon back to tip list


Tip: Net Tie-Down - I like to have my net in a predictable place. Some strap it to their decks or stow it in the large front compartment.

I mounted a tie-down against the wall under the port console. I can strap my net there and the handle fits in the space between the passenger seat and the side deck.

It's easy to get out during tournaments and most of the quality tournaments let you use nets again instead of flopping fish all over a boat.


Updates... Here's more info on several rod tie-down products that I believe are superior to nylon straps with velcro:

  • Super-Strap is what I used for the net. (Roger's Super-Strap, 1291 South Park Drive, Kernersville, NC 27284).), It's made from a sun-resistant material, Proflex 1253, and costs $5.99 at Academy, UPC 14669 11012. It's simple and effective. I used them for rods on the deck my last boat. Also saw this one at one of the Bass Pro Shops near Houston, TX.
  • T-H Marine offers similar RodTamer models in deck-mount and gunwale-feed versions. Two of the deck-mount versions with small hooks are used on the built-in rod holder inside a TR21 port rod locker.
  • Rodbuckle makes an after-market version of the two great "retractable" rod tie-down straps on each side of the TR21 front deck. It costs $9.99 at Academy (Rodbuckle, item F11493A, PN 12829, Indiana Marine Co., 18881 US 31 North, PO Box 408, Westfield, Indiana, 46074-0408, 1-888-WE-R-IMCO). This retro-fit retractor model requires a cut-out about 3.5" wide by 2" high on one side by 1.25" high on the other and is about 1.5" deep, a little different than the OEM model on the TR21. I also saw a surface mount adapter in a Rodbuckle advertisement.

fish icon back to tip list

  photo - stow a net with strap

above - a Super-Strap holding net


photo - where livewell can back-fill from overflow

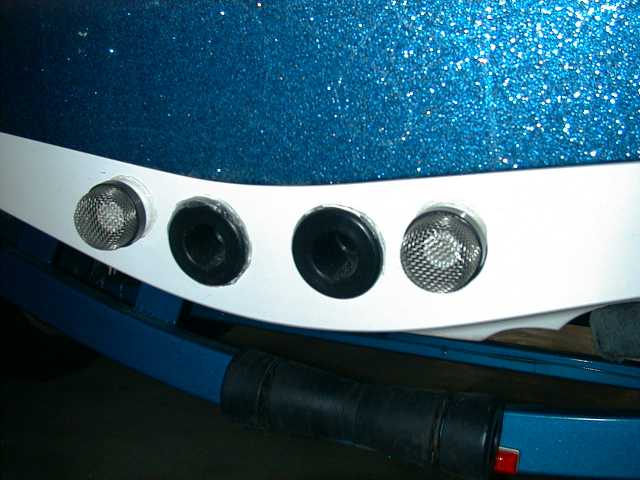
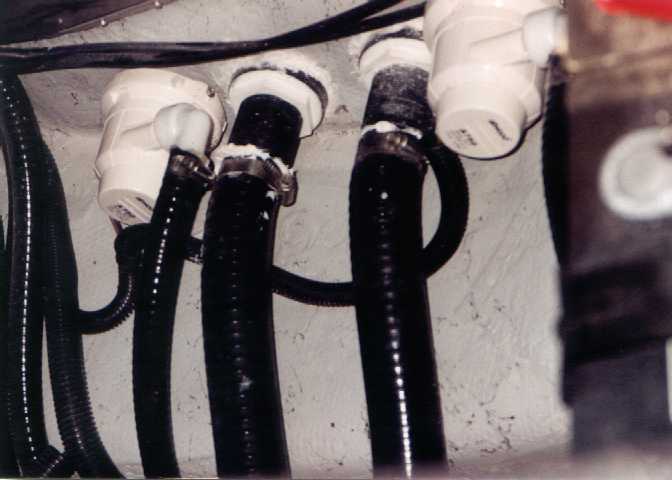
above - old outlets without scupper valve


photo - installed new Triton style TH Marine scuppers

above - inside look at installed T-H Marine thru-hull scuppers

picture of add-on scuppers

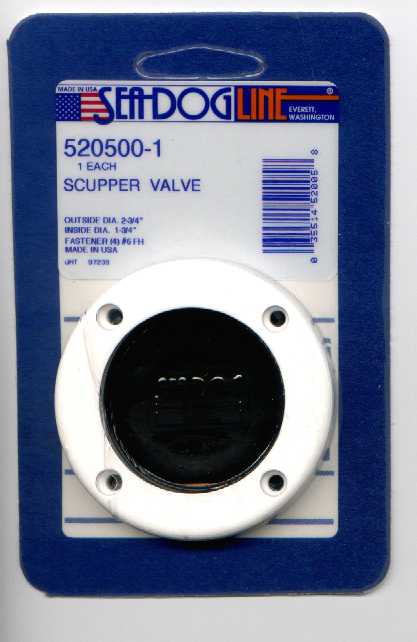
above - example of add-on scuppers


remember, click any image for larger view

Tip: Live Well Overflow - I finally figured out that the large overflow drain pipes for the '97-'99 live-wells take in considerable water at launch or off-plane. This situation mysteriously adds water to what you may have expected to be an empty live-well.

I reread the '99 Triton System Manual, and there's a warning about this anomaly there too!

This "back flow" is a side-effect from enlarged overflow pipes designed to match the substantial 750 gph delivery of your live-well freshwater intake pumps. That's right, these overflows are big on purpose.

When I first asked about this, a temporary suggestion was offered by Triton to remember to pump it out every once in a while. Smile now, don't be so serious all the time.

If you have a better solution, please email me.


Update - You can get something called scuppers that fit over the outlets to prevent back flow.

It simply uses a rubber flap to let water flow out but not back in. T-H Marine offers the thru-the-hull outlets with the scuppers built in used as an improvement by Triton on later year-2000 models. Note: these new thru-hull outlets may be a little larger than the '97-'99 outlet holes. I had my dealer install these thru-hull versions for me (see middle picture left).

Several readers suggested Sea Dog's scupper valve (see bottom picture left), as an add-on for '97-'99 models that screws "onto" the existing outlet. These cost about $3-$5 each depending on where you buy them. T-H Marine also offers add-on versions. When adding, use small screws to stay on outlet edge and not chip fiberglass underneath and also secure with a small lip of silicone sealant applied carefully not to interfere with the flap.

fish icon back to tip list


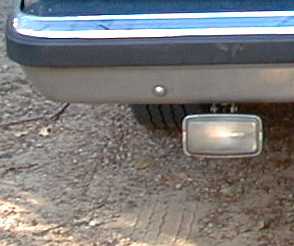
Tip/Troubleshoot: Bow Trim Switch - I quickly learned to be careful about stepping on or bumping the convenient trim-switch in the bow panel. I also learned that a trolling motor steering cable or other objects can press on it with the boat cover on.

I feel this handy feature needs a raised shield or a recess for safety and have not learned of a "Triton quality" solution or any aftermarket solutions yet.

If you have a solution, please email me.

fish icon back to tip list

photo - trim switch

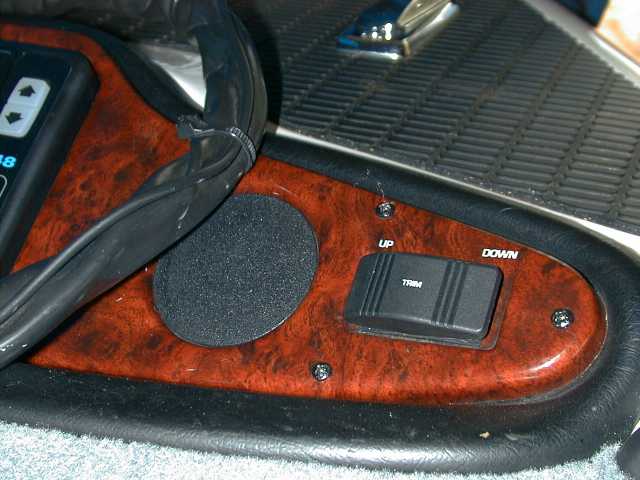
above - convenient bow trim switch


photo - rod socks on rod

above - rod locker, and rod sock on a rod


photo - socks easy to make

above - rod sock folded back to show stitching


drawing of rod sock construction

above - how-to diagram inside-out

(Remember, click on any picture for a larger view)

Tip: Rod Lockers, Rod Socks - Triton rod lockers hold a bunch of fishing rods. You can place seven onto the built-in rod holder in the port box. You can place more on the floor underneath the holder.

I got a Performance Thruster bass boat in 1981 with a small rod box. My rods quickly tangled in each others' line. Sound familiar. Tried the trick of wrapping the line a couple times. After a few weeks, I made something really simple from the legs of discarded blue jeans to keep my rods separate and protect the line-eyes and line. I called them rod socks. The stiff denim socks slid off easy and sometimes snagged hooks. Draw backs perhaps but also advantages... quick to remove and they dry out.

I still use my old rod socks for protection and organization, even in my giant Triton rod boxes. Lots of fishermen have seen these socks over the years and asked about them. I explained how easy it was for them to make their own. Read on...


Making a Rod Sock

They're patterned after the old rod and reel covers I saw on my uncles' fishing rods back in the fifties, just a little shorter so they protect only the rod and eyes.

They're easy to make. I use a stiff denim so they're not so floppy, and stitch a big roll-over in-seam that also adds some mild stiffness. Friends have made them with less stiffness, and they're more difficult to put on and take off.

Cut a six inch wide swath of denim as long as you need to cover your rod not quite up to your reel. See top picture to get an idea.

It's inside out when you sew it. I peeled one back around a bit so you could see how it was stitched.

Stitch a finished edge on the end that will be open. Now, fold the six inch length over in half to form the inside-out tube, and roll about a quarter to half inch back on each edge. Next, stitch down the middle of that roll-over edge all the way up the length of the rod sock. Sew the closed end shut.

Oh boy, now the hard part;  it's inside out, remember. You start at the open end and peel it over right-side out. Be patient, do a little at a time. It's stiff and it ain't gonna happen fast. After you've done one, the rest become easier, or you try being nice to someone that sews.

fish icon back to tip list


Tip: Trailer Light - The Triton highway-package trailer logo lights help when backing down a dark ramp at night.

Many years ago, I bumper mounted an inexpensive clear fog lamp kit on both sides of my rear bumper, and put the switch under the dash and relay under the hood. I can light up the driveway, parking space, or boat launch when backing my rig up.

Also helps when fixin' that flat trailer tire at nite, unhitching, etc.

fish icon back to tip list

photo - fog lites for backup

above - fog lamp kit for reverse ramp lites


photo - stow lites

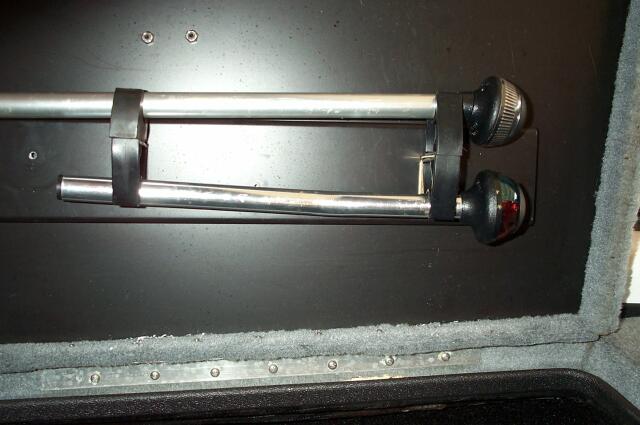
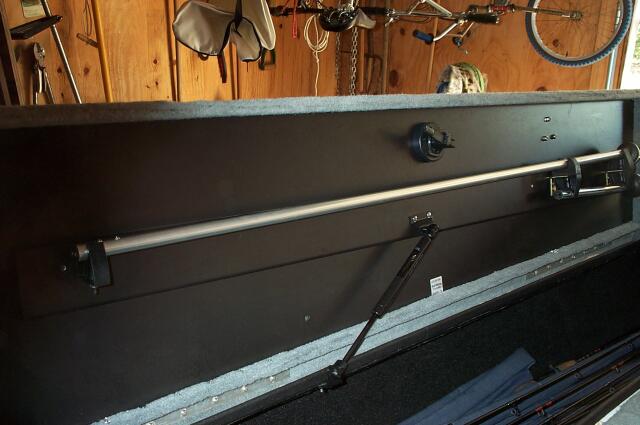
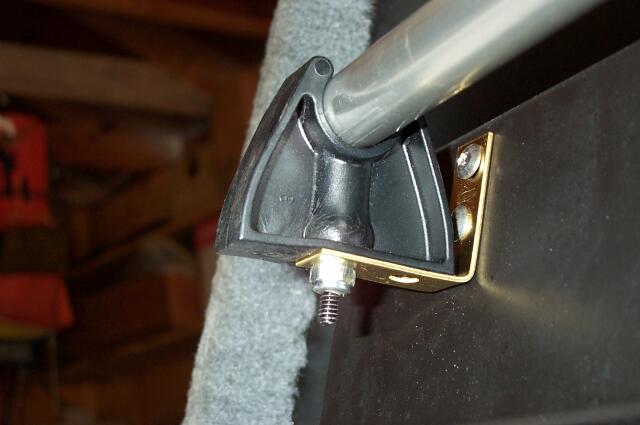
above - lights stowed on lid of rod box

 image - parts to remount lite holders

Above - parts to remount lite holders

 image - nut placed inside holder for one side

Above - nut placed inside holders for one side

 image - holders mounted and lites stored

Above - holders mounted and both lite poles stored

 image - lites remounted sideways

Above - lites remounted sideways

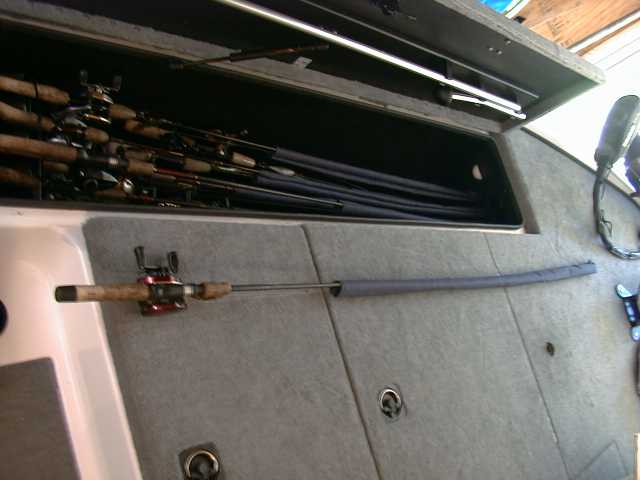
Tip: Light Stowage - The navigation lights conveniently stow under the port rod locker lid.

I sometimes drive rough water. When I open the locker, I may find the lights laying in the rods.

If you have learned about some solution or an aftermarket product that helps keep these more secure, please email me.


Update... Another nice discovery, I looked under the bow accessory panel when my dealer installed the Lowrance X-48. The rod locker carpet extends under and beyond the built-in rod holder almost to the nose tip, an area most boaters never see to realize the quality and care in Triton design.

While discussing a sideways latch to hold the lite poles in with Greg Heinz, he simply suggested why not mount them sideways on a little bracket. Greg is a smart man.

So, a package of brass L brackets, an extra mount and a few nuts for the old mount screws later, I go to work on mounting the poles sideways under the lid. The only trick was to put a nut inside holders for one side of the two back to back pairs. That way the screw could go thru one mount to the nut in the other, holding them back to back.

fish icon back to tip list

 image - holder sideways for base of larger lite pole

Above - holder sideways for base of larger pole

 image - both poles back to back sideways

Above - both poles back to back sideways


Tip: Water Pressure Gauge for Mercs - Even in good view, it sure is hard to read the water pressure of high-volume low-pressure '99 Mercury 225's on the 45 lb pressure gauge that comes standard on a Triton. The dial movement is only about a half of an inch from zero to max pressure of 12-14 lbs. Low pressure is less than an eighth of an inch movement.

"Planocat" and I talked about replacing the 45 lb pressure gauge with a Mercury 15 lb gauge. He got his dealer to order just a gauge (not hose and motor fittings) part number 825734-A2 at $44. He gave a positive report, so I ordered it too. For some reason, Mercury substituted part number 79-859687-A2 for mine and increased the price to $54.

This 15 lb gauge is a great solution for the big Merc's, but I can't be complimentary about Mercury sticking you and me $10 more (25% markup) for what appears to be the same ol' gauge but a different number.

I saw a Teleflex 15 lb gauge in the $40 range at Bass Pro Shops in Katy, TX, but know little about it.


Update... Took "Planocat's" advise. Loosened old gauge. Left the nipple siliconed onto hose. Unscrewed nipple itself from the old gauge without twisting hose. I guess you might say I unscrewed the gauge from the nipple. Teflon-ed and screwed nipple into new 0-15lb gauge. Tightened it all up. Oh yeah, put some masking tape on your dash first to keep from scratching it up as you spin gauge around to unscrew/screw it.

Now I've got a 45 lb gauge I don't need. You're better off getting your dealer to exchange it when you buy than discover this later like me and "Planocat." Realize other outboard motor's have higher flow pressures, the original may be ok for them.

fish icon back to tip list

photo - original 45 lb pressure gauge

above- original 45 lb gauge


photo - replaced 15 lb gauge

above - new Merc 15 lb gauge


photo - back of gauge

above - back of gauge where nipple screws on, unused nipple in bag


photo - pressure line (black) silicone-sealed to nipple

above - pressure line hose (black) silicone-sealed to original nipple


Picture of ShockBlock mounted on Gator Mount

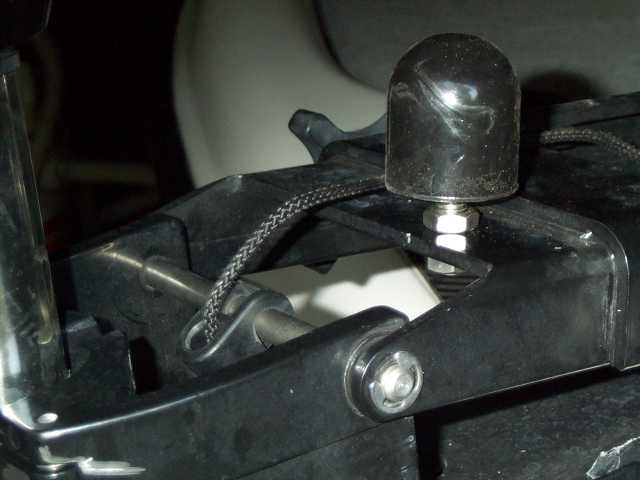
above - ShockBlock on mount in closed position


Picture of mounted ShockBlock from side

above - view from the side


Picture of ShockBlock with mount in open position

above - how it looks with mount open


(remember -click any picture for larger view)

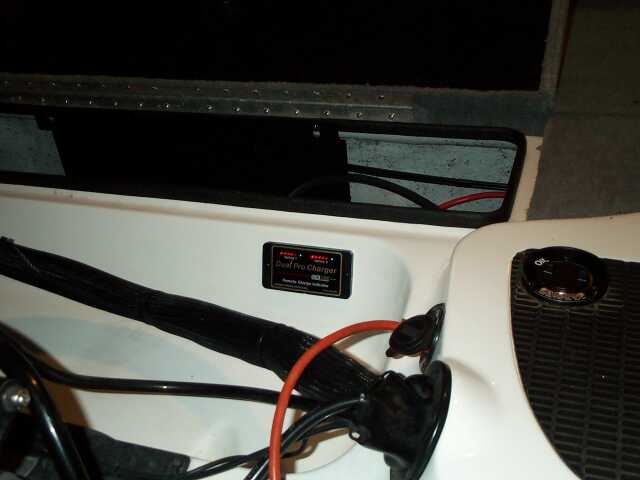
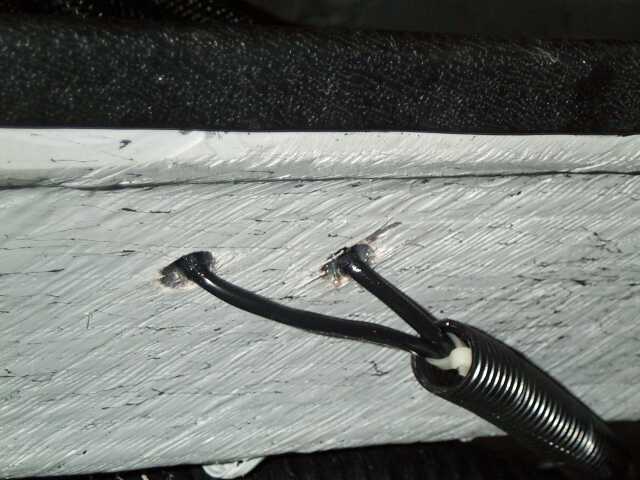
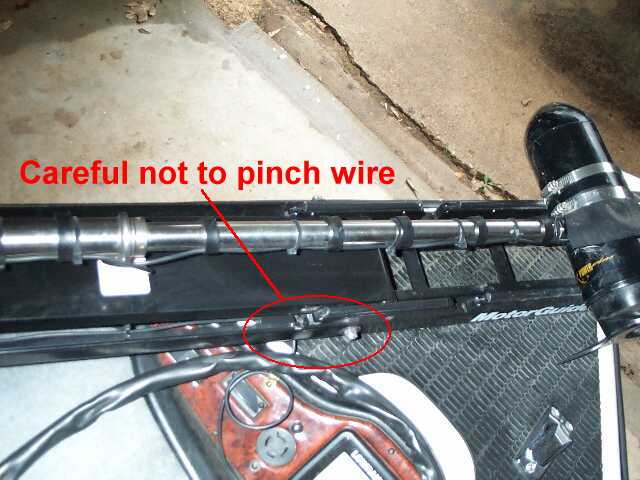
Tip: ShockBlock for Troll Motor - I ordered a $17 ShockBlock from Buck at Osprey Products (see my "Triton and other links" page). It's a soft plastic-like stop that can be bolted onto the MotorGuide Gator Mount used on my Triton. Different sizes are available. The product is designed to help stabilize a stowed trolling motor in rough conditions.


Update - It was easy to install. I eyeballed where it needed to bolt onto the mount to make square contact with the Triton cap. I marked that point and drilled a 3/8" hole in the mount. I slipped the bolt with one nut through that hole, added the second nut, then adjusted/tightened them using 14mm (9/16) wrenches so that the snub made secure contact with the cap. This all took about ten minutes, mostly getting the drill and tools out to work with. See pictures at left. Let you know more about it after some rough water.

Well, it handled rough water well. The retracted troll motor stayed rock solid as I drove over those main lake rollers around Veach on Sam Rayburn and around the hour-glass neck at Limestone. The snub did its job, adding a foundation for the retracted arm of the Motor Guide Gator Mount. The gel-coat under the snub still looks good. The ShockBlock is simple, practical, effective.


fish icon back to tip list


Tip: Dual Pro Remote Charge Indicator - I grew tired of climbing up to look in my battery compartment to see if my Dual Pro charger had power when I plugged into an unfamiliar outlet or had completed its charge cycle. I saw Dual Pro's new remote charge indicator accessory on another boat and wanted it instantly.


Update - The Charging Systems International remote came with instructions to drill holes and a template to assist mounting. The accessory is a flat panel with two wire series protruding from the back. I located a convenient area near my plug connection in the splash-well. Placed masking tape over the gel-coat, used the template, drilled two holes for the wires, situated the indicator, drilled screw holes, removed tape, mounted and screwed it in, then silicone-sealed the wire holes. Made sure I connected to proper battery terminals. Done deal. Works great. Real convenient.

My remote lights match main unit lights. One difference, remote greens stay lit after power off as a status marker until batteries drop to a prescribed level.

Charging Systems International make a similar product for their Triple Bank Charger model. Slightly larger, three wire series protrude from it.


fish icon back to tip list

photo closeup of Dual Pro remote charge indicator

above - close up of indicator


photo of mounted remote in splash well

above - location of remote in splash-well


photo looking at back of mounted remote

above - view from inside the battery compartment


(remember, click any image for larger view)


Photo - water pickup plate installed

Above - plate over water intake ports on lower unit


photo - Mercury water pressure gauge

Above - water pressure gauge


remember, click any image for larger view

Tip: Water pickup plates - I could never raise my '99 Mercury 225 EFI to optimum running heights on my Triton TR21 because water pressure would begin to drop approaching those heights.

An early service bulletin (#96-21) suggested several updates for potential overheating influenced by air coming in a lower unit's water intake or drain holes. I was not overheating but we felt the bulletin applied because I probably would if I were to raise my motor to proper height...

One of the service solutions included Mercury water pickup plates to help direct water into intake ports and this was endorsed by several BFHP readers. A friend with a TR22 and Merc 250 said his motor came with them attached and was equally positive.

So, I asked my local dealer to add Merc's water pickup plates to my motor. We learned that there are more than one size plate. Mine uses three screws while my friend's used two screws and was smaller.


Update - It looks to be a simple idea. My mechanic noticed a particular bend in the plates which cover intake ports but leave a quarter inch gap in front that scoops in passing water. They apparently keep ports inundated as speed and motor height rises with ports partly above water. I'm just guessing. I noticed no negative impact on pressure at lower speeds or idle.

Effects of simply adding the pickup plates were immediate and dramatic. First, my water pressure around 4000 rpm was raised from 12 pounds up to 16 pounds. Second, the higher pressure sustained as the motor was raised on the jack plate into optimum running heights. Third, there was no change in the water pressures at rpms beneath 4000 rpm which remained at the previous 8-12 pound ranges.

Observing the area between the plates and the intake ports, I can see I will need to continue to observe water pressures on the chance that peculiar obstructions might accidently lodge there.

Please note, recent Mercury models addressed sustaining water pressures by adding intake ports under the nose cone on the lower unit.

fish icon back to tip list


Tip: Saddle style stand-up seat - I have two discs removed from my back... too much dirt biking and heavy lifting in my youth. I needed a stand-up seat with back support. Saw one once that looked like a motorcycle seat on a Champion boat.

I stopped by a Champion dealer in Houston several years back, and they had some in a catalog. I ordered it for my then Skeeter boat colors. It still matches my Triton colors now.

I could not fish a two or three day tournament without its support. If you're not used to riding bikes, the style could be uncomfortable. It really helps when you're riding that bucking-bronc boat trying to hold on a windy point.

fish icon back to tip list

 photo - saddle seat not on stand-up pole

Above - saddle seat not on stand-up pole


 photo - boat with saddle seat on stand-up pole

Above - boat with saddle seat on pole


 photo - package with a few unused clips

above - package with a few unused clips


 photo - clips on shaft next to old nylon wire ties

above - clips on shaft beside old nylon wire ties

Tip: Wire clips for trolling motor shaft - I used nylon wire ties to secure my transducer wire to the trolling motor shaft. While shopping in Academy one day, I saw a neat $2 package of clips to do that same thing, much neater solution and cheap too. They're available from Boat Buddy in Fort Worth, Texas, 800-742-8339, but priced less at my local Academy.

fish icon back to tip list


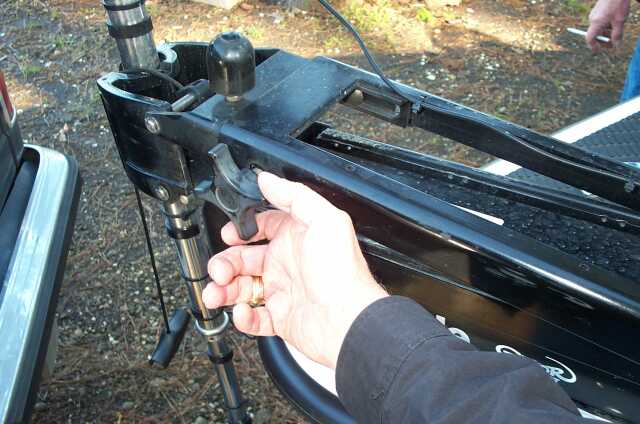
Tip: Spring return for old Gator Mount - Every time I bumped into a stump in muddy water with my trolling motor, my Motor Guide's Gator Mount would do what it's supposed to do... give a little at the pivot point. But, then I'd have to loosen the tension knobs, pull the motor back, and tighten the tension knobs.

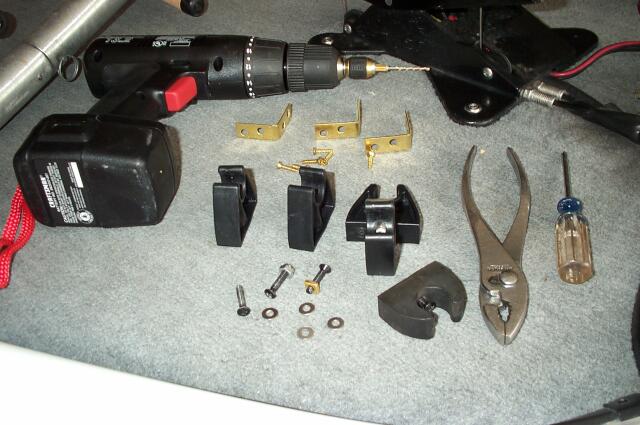
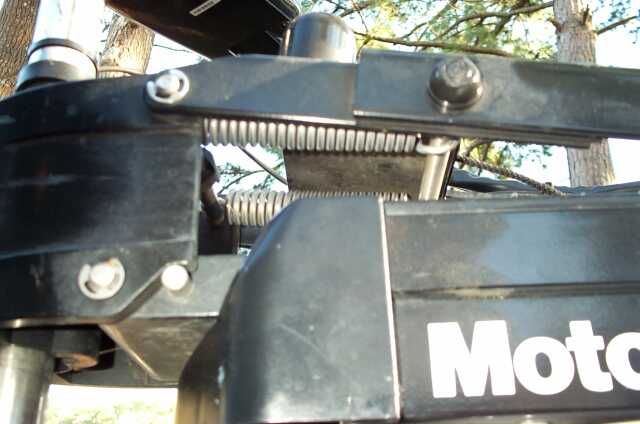
After a morning of bumping into my hundredth stump over on Toledo Bend, I'm ready to buy the new Gator Mount with springs in it or (gulp, flinch, twitch) buy a giant Minn Kota terrain model.

Spring Break to the rescue. We read about this $20 add-on accessory in Honey Hole magazine. My friend, Gerald, and I looked for them at Academy (it's from the same guy that makes that great ProKonTroll pivoting steering stick for the hand steer trolling motors) but they didn't have them.

Gerald called and ordered it for us. If you can't find it local, try Outdoor Texas online at http://www.outdoortexas.com/spg.htm or Trolling Motors Unlimited at 504-277-9595 or the manufacturer, PIC, at 888-868-0238. It took about five minutes to install by removing the old tension knobs and bolts, inserting the pin, capping each side, then stretching the two springs over that pin and the pivot pin on the motor mount using the tool provided.

I used a small hammer and wood blocks to tap caps onto the pin after inserting it. A friend held one block against the pin as a back-stop. I also used a vise-grip to hold the flimsy "tool" while pulling the spring from one pin to another. My friend pushed down with back of a screwdriver to snap the spring down when I got the end over the pivot pin.


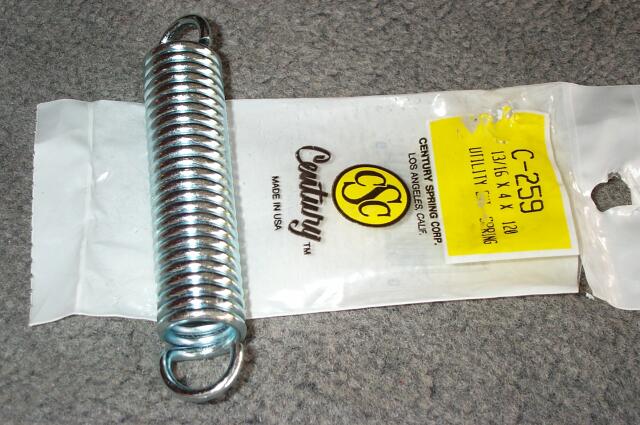
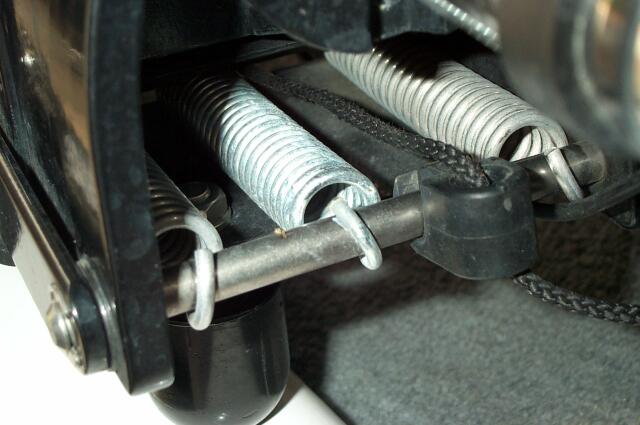
Update: I had my usual stump bump morning at Toledo Bend. The Gator Mount gave and pulled back into place over and over. See me grinning from ear-to-ear.

When you have the motor on higher power and steer backwards, it will fold under but not using lower power. It did that for me with the old tension knobs anyway. The springs are not huge like the new Gator Mount II. Small price to pay for the convenience, and it pulls back when you power down or steer in forward directions again. I also have a TransducerSaver so I don't worry about my transducer under the motor while bumping through these east Texas stump fields.

After a month, I experimented with a third and forth spring from a pair I picked up at Tractor Supply Company (Century C-259 package). Kinda beefs it up like the new Spring Break that PIC will offer for the larger Motor Guides. Note - I had to grind a bit of the hook off on the spring ends so they would hook over the pins like the originals.

fish icon back to tip list

photo - Spring Break parts 

Above - Spring Break parts

 photo - taking off old tension knobs

Above - taking off old tension knobs and inside bolts

 photo -springs mounted over pins

Above - springs mounted over pins

 picture - extra spring

Above - Extra springs from Tractor Supply

 image - extra spring mounted

Above - extra spring mounted

remember - click any image for larger view


Return to Rip's Triton Tips main page.

Also consider exploring BBC Home Page for Bryan Bass Club information and links to other bass fishing/boating sites.


Ray's Triton Page | Buying Adventure | Area Dealers | Rip's Triton Tips | Other Links | BBC | Ripstips Home

For corrections on this page series, please contact Ray Rippstein at r-rippstein@tamu.edu

Thanks for visiting.

This intro page last updated March 11, 2010