Rip's Tips - Settling In      

Other tip pages:   general comments  |  rigging  |  settling in  |  fixing stuff  |  gadgets  |  discussion

This particular tip page series highlights little stuff I learned about my '99 TR21 the first month or so out on the water...
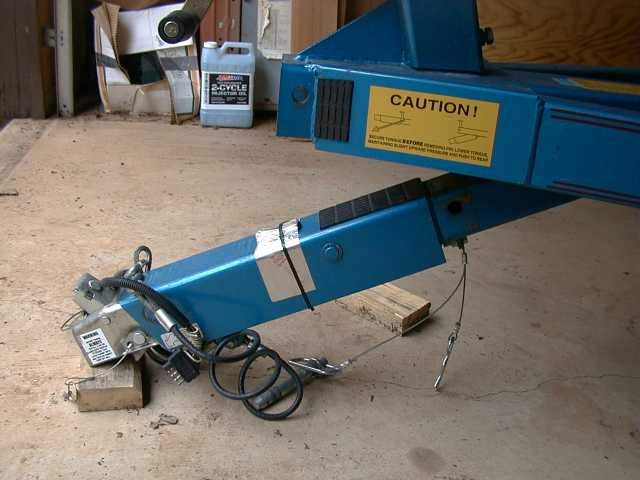
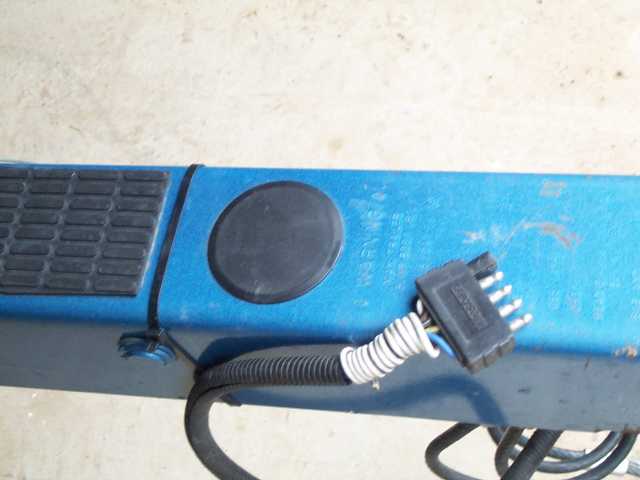
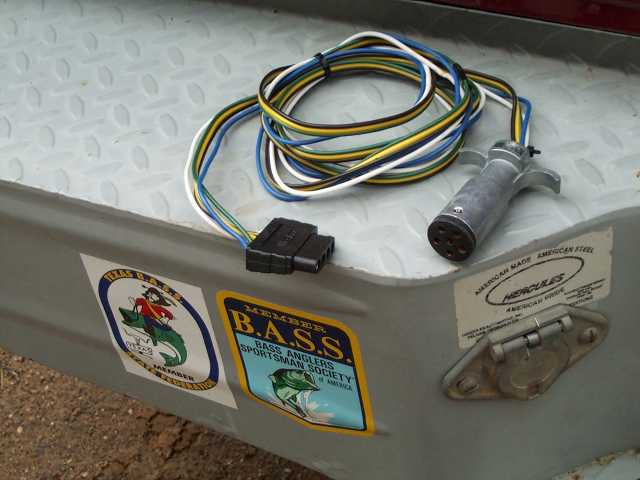
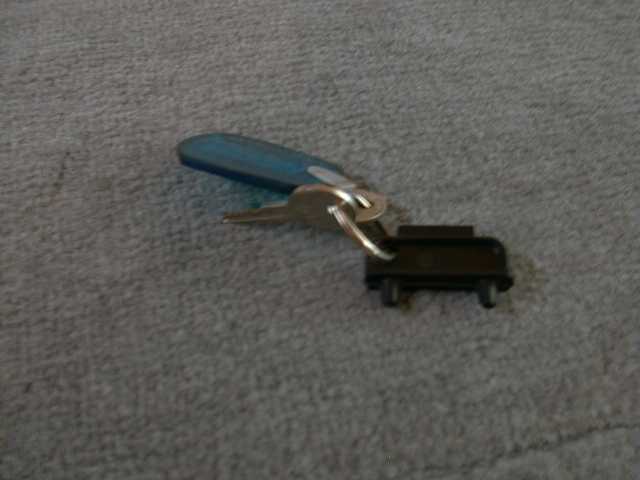

Tip: Live Well Rubber Plugs - Well duh, I figured out that supplied rubber plugs needed to be placed into the holes in the bottom of each live-well for it to retain water.

No problem, just different than the remote drain lever system I was used to in my last boat, and briefly explained in my user literature.

Don't forget to put your plugs in (ditto ice chest), and don't lose them.

I actually read about the rubber plugs and concepts of gravity-fill and gravity-drain in the '99 Triton System Manual discussion of the live-well.

fish icon back to tip list

livewell plugs

above - rubber drain plug in bottom of live well


rotary switches

above - the rotary switches


live well pump out at weigh-in

above - pumping out live well at weigh-in


resetable fuse panel

above - reset-able fuse panel behind rotary switches


Tip: Live Well Rotary Switches - Fortunately, a tournament friend explained, in native Texan language, the Triton live well rotary switches...
  • "livewell" adds fresh water and fills it
  • "recirculate" recirculates the water and adds air bubbles through the max-air intakes next to the driver
  • "timer" makes both of those manual or timed actions, and
  • "pump out" drains water from the live wells without removing the rubber plugs in the gravity drain holes.

If you're not a landlubber, you know rotary switch labels for "port" are passenger side and "starboard" driver side, and hopefully "both" is self-explanatory.


Update... When fishing with a partner, I generally put the "live well" and "recirculate" switches on "both" and the "timer" switch on "timed." This periodically adds fresh water to both live wells, aerates it, and any excess water ladles over tops of the overflows.

At weigh-in, the "pump-out" feature permits me to conveniently fill or add to tournament weigh-in bags using treated water from my live wells. Plus, reducing the water levels in the two 22 gallon live wells enables quick retrieval of fish (see middle picture left).

I like it, and I really like these rotary switches and the reset-able fuses (see bottom picture left).

fish icon back to tip list


Tip: Live Well Outlets - The two live wells have separate outlets. The "fill" outlet is in back at the top. The "recirculate" outlet is mid-way up on the back wall. The large "overflow" is at the top near the fill.

Two T-H Marine "max air" venturi intakes are located on the TR21 gunwale near the driver. These intakes supply air bubbles into any recirculated water flow. They use venturi effects on special outlets to mix in air.


Update... I personally think the T-H Marine "max-air" system introduces bubbles better if the live well water level covers the recirculate outlet.

A Triton TR21 option called T-H Marine "pro-air" is completely different from the "max-air". The "pro-air" uses a 12v air pump and an air stone to introduce air bubbles, independent of recirculation.

While underway in rough water, live well water will surge about repeatedly sloshing over into the large over-flow. Your high-capacity live well pumps and water intakes below the transom can rapidly replace lost water, however intakes are likely out of the water if you're running at speed. Sure, you could plug or partially obstruct the large overflows but then risk over-filling your wells.

Be mindful of your catch and simply observe and refresh water levels under adverse conditions. Remember to keep the rubber plugs in lower drains so water doesn't suck out on plane.

fish icon back to tip list

live well outlets

above - view of outlets inside live well

photo max air intakes

above - max-air intakes on gunwale next to driver


retractable tongue

above - strapped down cap


plastic cover over hole, brake cap stored

above - plastic cap over hole and brake cap stored, Wesbar 5-plug


brake release cap, removed

above - brake release cap removed, ready to store


make your own wire/plug adapter

above - make your own wire-plug adapter


Tip: Retractable Tongue, Brake Lockout - I really like the convenient retractable tongue on the MFI tandem axel trailer. It lets me get around my Triton in the garage.

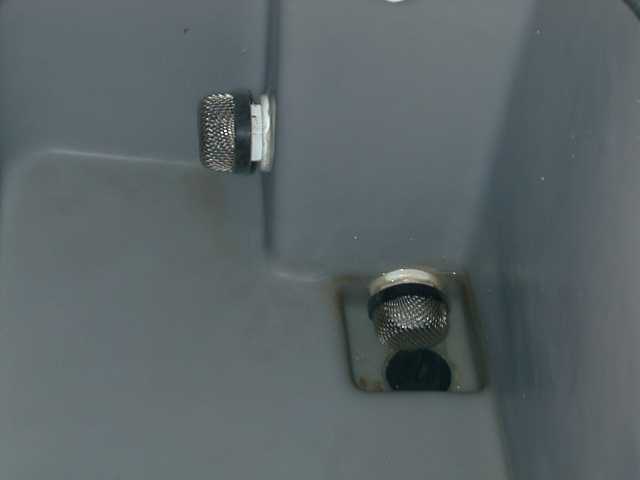
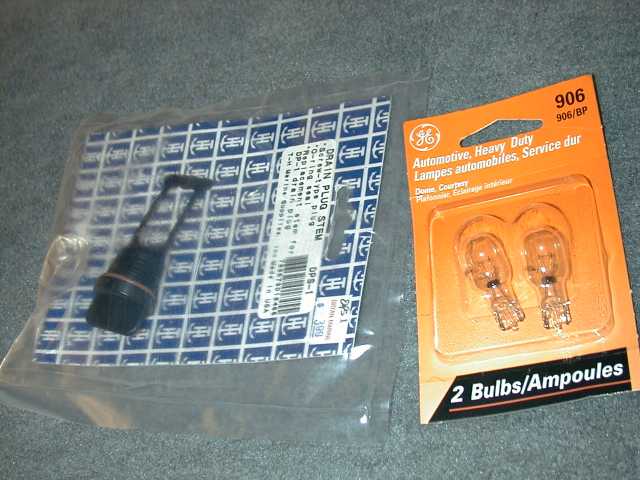
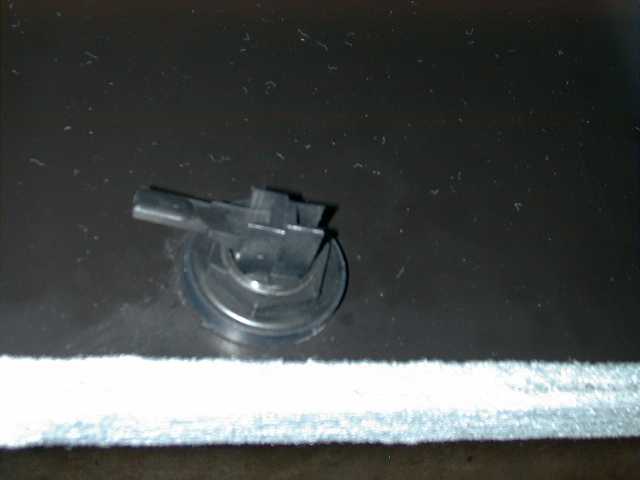
Help!!! Any ideas about how to attach a bow-eye safety chain to the MFI trailer? My '99 does not have one to back up the winch strap.

Notice I have a plastic tie on the brake lock-out cap/dial. This little metal dial on the UFP brake actuator kept getting loose and coming off. Mike Witt's service tech, Mike VanNatta, recommended this temporary solution. If you have a similar situation or learned a better quality solution, please email me.


Update... UFP makes a plastic cap for actuators without the metal brake release dial. Simply use the plastic cap for everyday use and store the metal release dial safely in the glovebox for when the dealer or you might be moving trailer with wires not connected.

That new wire plug connector (five) on my disc-braked tandem axle trailer is not like my old plug (four). The extra wire hooks up to the vehicle backup light to activate the brake release solenoid on the trailer. I couldn't find a similar plug to wire my other truck at local auto parts or trailer supply stores.

I wanted to give local marine dealers some business, so I contacted Wesbar for the part numbers to place an order. On the vehicle side (female), mine's a Wesbar "5-flat trunk connector" part #7273. On the trailer side (male), mine's a Wesbar "5-flat trailer connector - wishbone" part #7283. (Thanks to Mike Walter, sales manager at Wesbar, for this info). Link to Wesbar on link list page.

It seems to be designed so it can connect to most other four connector plugs but the extra connector left open needs a feed from a back-up light circuit. You can patch-rig it to use a friend's tow vehicle. If you or your friend have a round 7-prong plug on the truck for trailer light connections, you can order a Wesbar #7257 round-7 to 5-flat prong adapter for about $24 or custom-make one like I did before the adapter was available (see picture).

fish icon back to tip list


Tip: Screw Plug, Lite Bulbs, Fuses - I visited my local auto parts and marine dealers to pick up some spare parts that fit my Triton like the new screw-style T-H Marine DPS-1 drain plug stem or #906 navigation light bulbs.


Update: Those with the foot throttle option may want to pick up an extra HFS-1 Hot Foot Replacement Spring through their dealer. Hint - if you and your dealer look through a T-H Marine Supply wholesale catalog, you'll recognize many Triton accessory components installed above and below deck.

If you have a Mercury 225 like mine, don't forget an extra plug-in fuse (SFE 20 AMP) used under the cowling for primary and starting electronics. Depth finders may have in-line fuses that need spares too.

I also carry parts/tools for my spare prop like thrust washer, nut, lock washer, and deep socket that fits the nut.

fish icon back to tip list

spare plug and bulbs

above - examples of spare parts

(Remember click on any picture for larger view)


buddy bearing grease ok

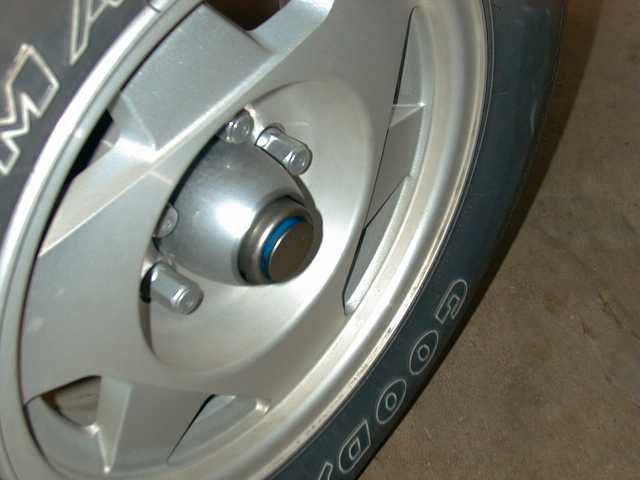
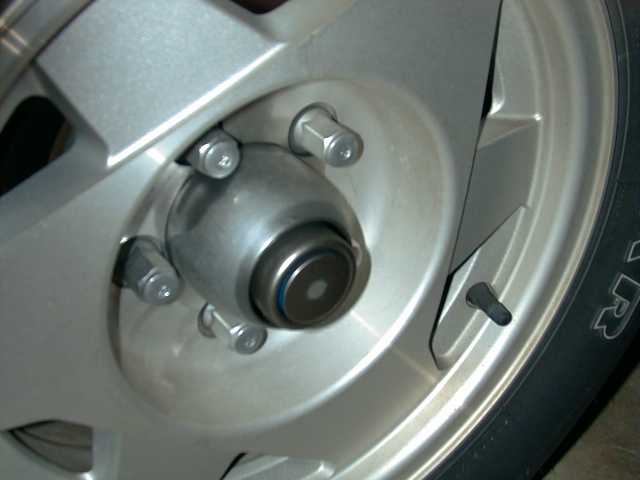
above - hub has adequate grease


buddy bearing needs grease

above - hub needs a little grease


Tip: Bearing Grease Level - I read in the Trailer Buddy bearing manual about how to tell when these new style "blue cylinder" Stainless Steel Wheel Bearing Protectors need grease. The blue Auto Check cylinder should be out just a bit beyond the rim of the Trailer Buddy bearing cap for normal grease levels.

When the blue cylinder retracts back even with the rim of the Trailer Buddy bearing cap, it needs a little more grease.

To get to the grease fitting, "carefully" pry the little chrome cap off the end of the blue cylinder. The flat cap is snapped in with small tabs all around its edge. It's metal, but the cylinder is plastic. One of mine was already chipped when I looked at it the first time.

Read and follow instructions in the bearing manual. There's also info about replacement wheel bearing seals and stuff that you'll need some day many years from now. Don't lose it.


Update - Observe your protectors, don't overfill but maintain grease at recommended levels. Grease leaking around a stainless protector cap should be inspected by your dealer for possible replacement.

fish icon back to tip list


Tip: Compartment Latches - The T-H Marine composite compartment latches may be a little stiff at first. I'm pretty careful not to pull compartments open with a latch closed.

Two compartments in the stern of my TR-21 have trays to organize tackle. The trays have a cut-out on one side to accommodate the latch. I'm careful to replace the tray with the cut-out and latch lined up.

One of the three trays for my battery compartment has a similar cut-out. That tray needs to be in the middle with the cut-out lined up with the latch. I find my compartment closes better with that tray resting over the edge of the other two.


Update - Take a minute to show and explain how these latches work to your fishing partner. Ask them to keep the wire pull tucked down so they don't step on it and bend it while walking about. My little rubber seals on the key holes were broken off by foot activity after a few months.

Three of my compartments are designed to hold Plano 3700 storage boxes. This is called P.A.L.S., Pro Active Lure Storage feature.

And, there's a Triton fish measuring stick stored under one compartment lid. Great convenience! The edge of the stored ruler sticks down a bit, simply be careful about what you pile on top of Plano boxes on that side.

fish icon back to tip list


 compartment latch

above - example of T-H Marine composite latches


tackle compartment tray

above - position cut-out to permit latch closing


battery compartment trays

above - slots in drop-boxes that permit latch to close


tackle storage, ruler

above - Plano boxes stored in a PALS compartment


step up to rear deck

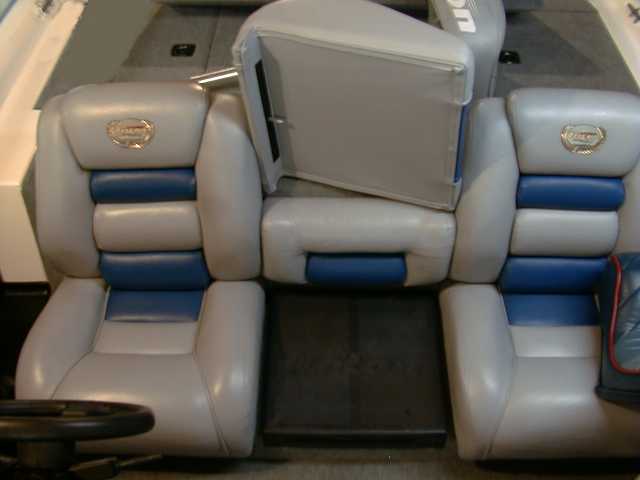
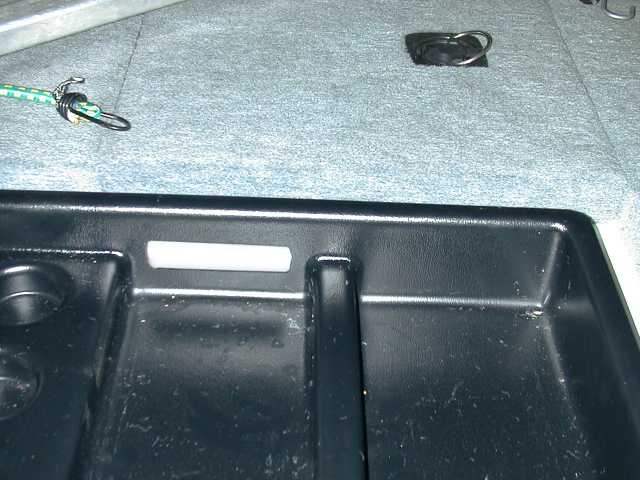
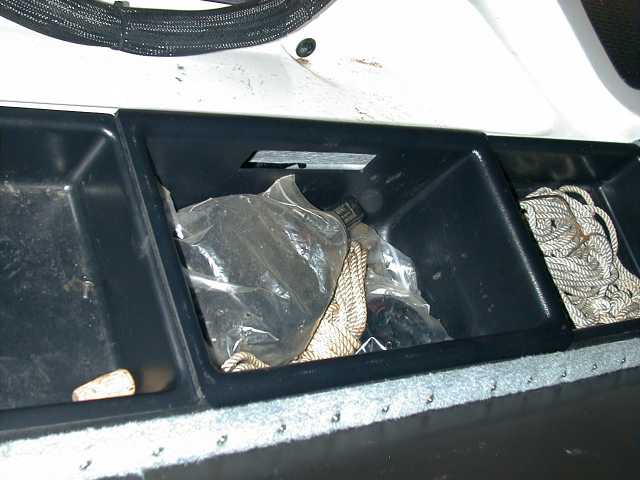
above - middle seat removed to reveal step

Tip: Removable Seats - Did your dealer or a friend show you that the center seat on the dual consoles comes off to reveal a convenient step to the back deck?

You don't have to tear up that upholstery going to the back.


Update - A couple Triton owners advised BFHP readers that the convenient removable nature of these seats can also be inconvenient if they accidently come loose at the wrong time, like on the lake or roadways.

They're held secure by a metal pin and velcro strip on the TR21. So far, mine are tight.

If any of you would like to share ideas about making them more secure, please email me.

fish icon back to tip list


Tip: Removable Windshields - Did your dealer or a friend show you how easy it is to remove these Triton windshields with the four little quarter-turn fasteners.

Cleanup is so easy. These little conveniences add up, ya know.


Update: Glance at your fasteners every so often to be sure they are still turned to the locked-on position.


fish icon back to tip list

removable windshield

above - removed windshields


Tip: Gas Cap Tool - Noticed a black plastic thing in your Triton parts bag that has two round tabs on each end and the brand name Perko stamped on it?

I know you already figured out that it's a tool to help take off the Perko gas cap on the port side if it gets stuck.

The tip is... it makes a nice fob on the key chain for the boat. Keeps it from getting lost and handy if you need it at the pump.

fish icon back to tip list

gas cap key tool

above - Perko tool on keychain


Return to Rip's Tips main page.

Also consider exploring BBC Home Page for Bryan Bass Club information and links to other bass fishing/boating sites.


Ray's Triton Page | Buying Adventure | Area Dealers | Rip's Triton Tips | Other Links | BBC | Ripstips Home

For corrections on this page series, please contact Ray Rippstein at r-rippstein@tamu.edu

Thanks for visiting.

This intro page last updated July 3, 2006