Rip's Tips - Fixing Stuff      

Other tip pages:   general comments  |  rigging  |  settling in  |  fixing stuff  |  gadgets  |  discussion

This particular tip page highlights a few things my Triton or Mercury dealers serviced in the first few years to insure customer satisfaction...


photo - end cap at bow stop

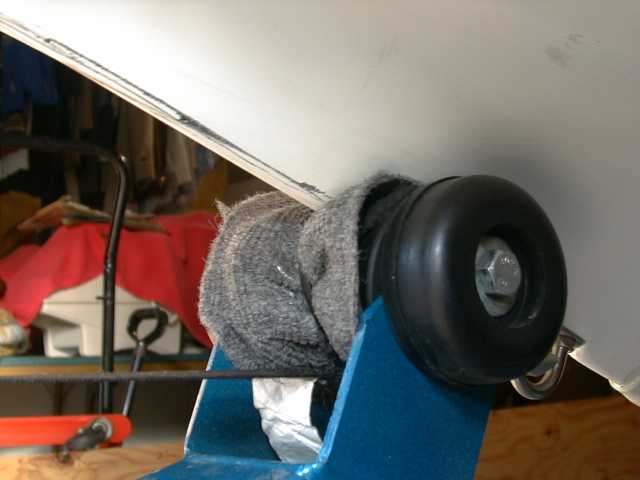
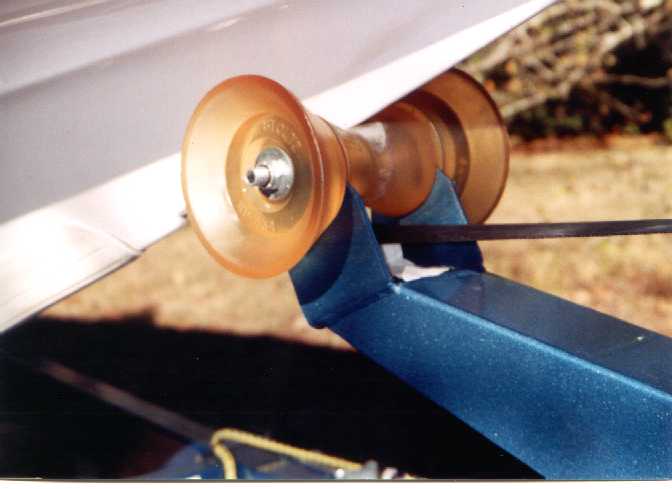
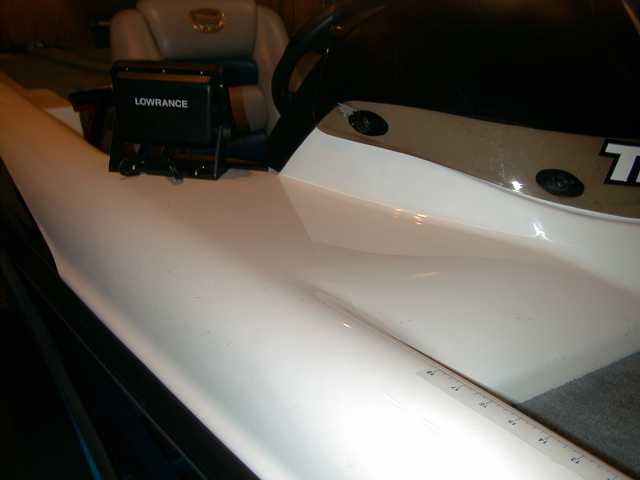
above - the bow stop with washer added


photo - Stoltz bow stop

above - a new Stotlz bow stop


Tip/Troubleshoot: Washers For Bow Stop - Take a moment to check your Triton trailer's bow stop roller to be sure washers and not just a bolt retain the end caps.

As I pulled onto my trailer, an end cap popped off the rubber bow stop at the trailer winch, scratching a little fiberglass just above the bow eye.

I discovered there were no retaining washers in the rubber end caps. I snapped the end cap back on over the bolt. Back home, I added washers to the end caps (see washer behind bolt in picture upper left) and tied some carpet over the rubber stop as my own temporary solution.

If you learn of a better solution, please email me.


Update... I contacted MFI, my tandem trailer manufacturer (www.metfabinc.com). They're currently using washers in the end caps. My end cap continued to remain secure after adding washers. I tried this simple fix for a while. MFI was very cooperative.

Some readers suggested an aftermarket solution, the Stoltz Ultimate Bow Stop, available from marine suppliers like Bass Pro Shops. They say it's material is better for white colored bows too.

Yep, I had my dealer put a 4" Stoltz on my trailer after giving the OEM black roller a chance for a couple more months. I grew tired of cleaning the black marks from the roller off the white hull. The Stoltz is a definite improvement (bottom picture at left). Keep it clean to reduce grime marks.

fish icon back to tip list


Tip/Troubleshoot: Bilge Plumbing - The bilge areas behind the two metal plates contain lots of pumps, hoses, seals and clamps. A connection may work loose.

I had some water getting into the bilge. Listed below are check-point areas my dealer and the service tech looked at or resealed during five visits in May, June, September, October and December:

External bolts...

  • transom tie-down u-bolts (resealed)
  • forward bow u-bolt (resealed)
  • motor/jack-plate mounting bolts

Below water-line plumbing...

  • exit fittings in transom for live well over-flow, pump fill, and gravity drain
  • transom exit fitting for bilge drain
  • internal hoses and connections for live well over-flow, pump fill, and gravity drain (resealed port overflow)
  • pumps for live well fill (also while running)
  • pumps and hoses for live well recirculate (also while running)

Live well...

  • live well containment (when full)
  • top seal of live well to deck (repaired gap, resealed)

Gauge water feeds...

  • water pressure and speedometer hoses, gauge connections and gauges (under pressure)

Ice chest...

  • ice chest drainage (eliminated as contributing factor)

Cap areas...

  • remote oil fill and charger plug on boat cap (resealed)
  • seal around bilge, live well pump out, and fuel fill on boat cap
  • seal around motor harness on boat cap
  • rub rail screw fittings (resealed)

None of my friends or tournament acquaintances with Tritons had similar problems with leaks. Triton uses a water tank test for quality control. Just my luck.

I'm sharing these check points and a concise step-by-step check list on my discussion page to help Triton dealers/owners quickly resolve any leak that may get past the tank test or develop over time. Each time I informed them about human-error problems, Triton representatives presented solutions.

fish icon back to tip list

photo - transom tie down leak area

above - outside transom area at tie down bolts


photo - upper transom area near motor bolts

above - upper transom area near motor and tie-down bolts


photo - bilge plumbing - live well side

above - bilge live well side


photo - bilge plumbing - tansom side

above - bilge transom side


photo - missing decal earl bentz

above - Earl Bentz decal gone, goo left


photo - missing decal tr-21

above - TR21 decal gone


Tip/Troubleshoot: Decals - I discovered that my "Earl Bentz" decal simply peeled away while running down the lake. It just left goo where it used to be. See, it's not just Ray Scott's hat that gets blown off like in the old Triton ads.

Then I discovered that one of my TR-21 decals disappeared. Others aren't sealed well either.

Awaiting solution via a scheduled appointment with dealer. If you have learned about some solution, please email me.


Update... Thanks for all the suggestions to drive a little slower so as not to peel stuff off my boat.

A solution was quickly identified. Your dealer should be able to replace any decal that had adhesive problems. Simply call and report your problem, so they can request replacements from the factory.

fish icon back to tip list


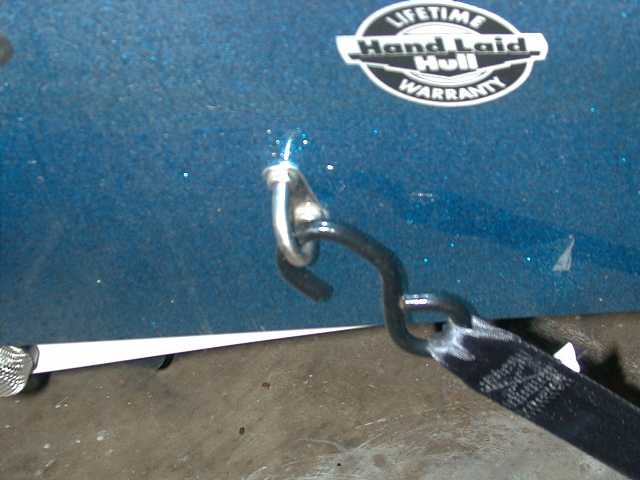
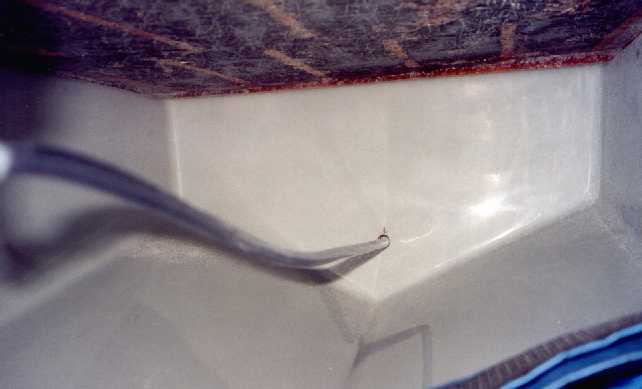
Tip/Troubleshoot: Lid Support Screws - A reader on the BFHP boat/motor message page offered an alert and solution about screws for support rods on certain compartment lids dripping a little in a heavy rain.

The readers tip... simply loosen screws, apply a touch of sealant, and retighten these if you experience some dripping water into your tackle and rod compartments.

If you have a better solution, please email me.


Update... When I finally got soaked one day, only my center compartment seemed to have a small drip (see picture right top). I did sealant on all my compartments cuz this solution was so easy.

And here's my extra tips for you or your dealer...

  • lock nuts use a 3/8 socket, screws use a Phillips-head screw driver
  • loosen and seal one screw at a time, let the other one hold the bracket in place.

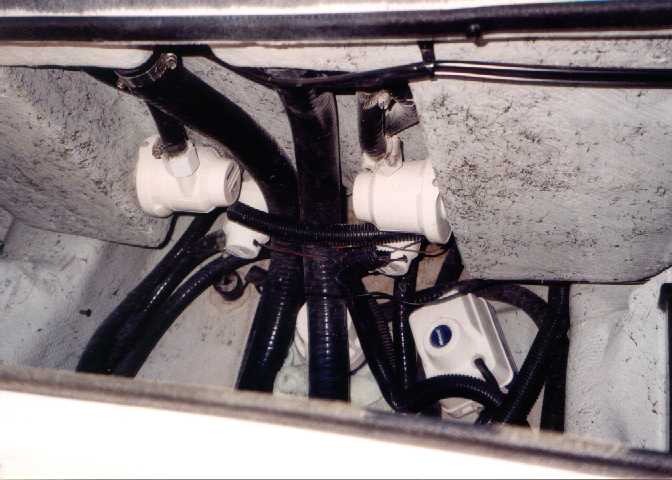
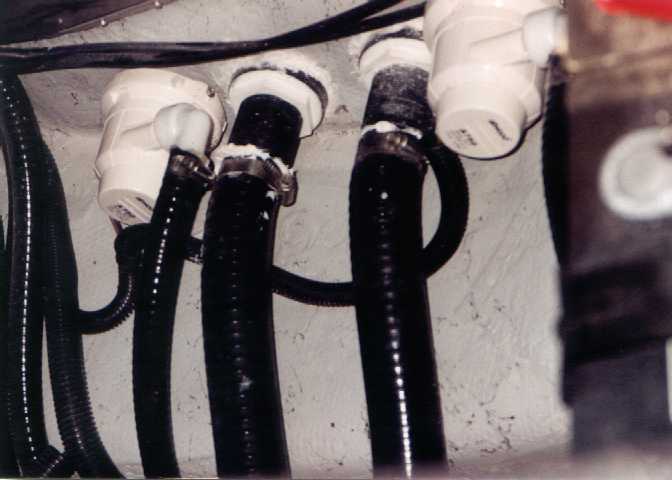
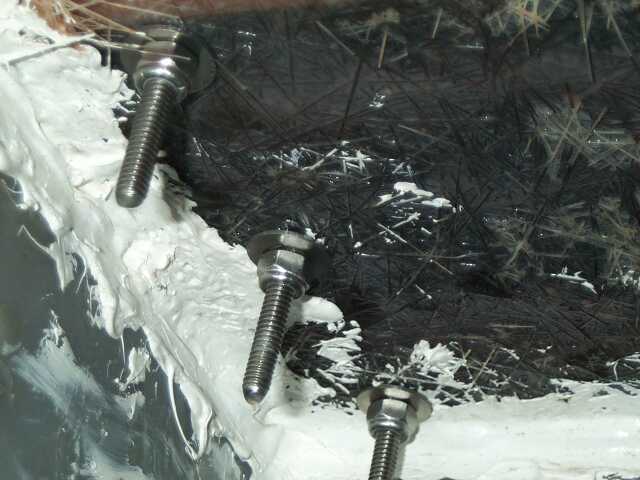
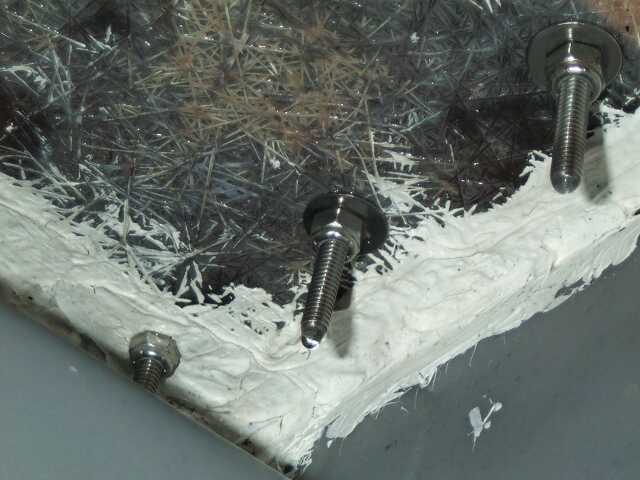
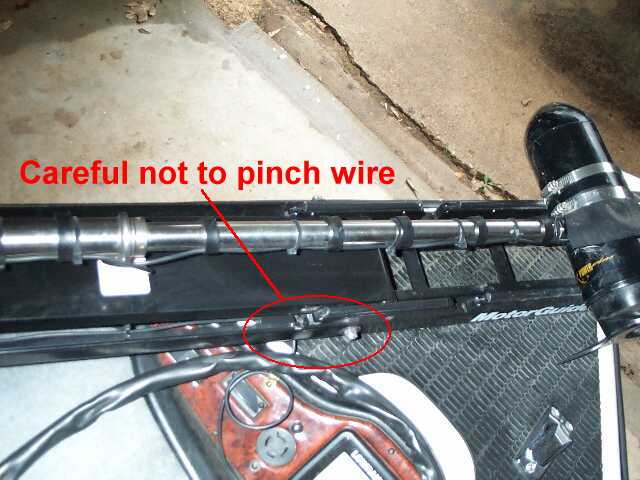
While on the compartment topic, Triton uses a quality T-H Marine pedestal drain assembly on the front pedestal. The drain tube is routed through the huge front compartment (see picture right bottom) into the bow under the front accessory panel. There, the tube should be positioned so it travels back under the front compartment and drains down the center of the boat. If it gets pulled out of place while wiring accessories up front, you may notice rain water flowing into the front of either rod compartment located left and right of the front compartment. Simply reroute it back down the middle.

Oh yeah, notice how BIG that compartment is.

fish icon back to tip list

dripping screws

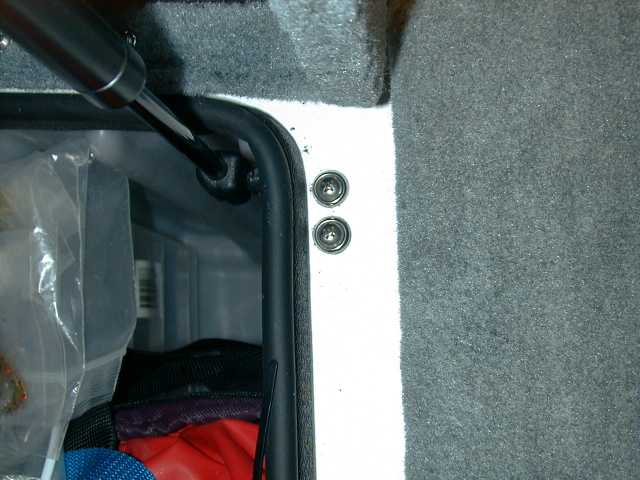
above - lid support screws on my center compartment


pedestal drain tube

above - forward area under deck in front compartment


photo - looking up toward pedestal base inside livewell

above - looking up at repair inside port livewell


photo - looking up toward pedestal base inside livewell

above - looking up at repair inside starboard livewell


Tip/Troubleshoot: Rear pedestal - The floor under my rear pedestal began flexing in the summer of 2000.

My dealer addressed a problem in that area before. We learned during my first year of ownership that I had water seeping over the top of my live well between it and the cap. At the time, they added a substantial bead of sealant around the top of the live well to cure that leak.

The pedestal base is sealed into the cap in the same area. Closer inspection by my dealer revealed that fiberglass layered around the base had become unstable.

Update - Repair after discovery was immediate. The carpet was removed. The area was re-glassed, and the base was additionally bolted beneath the cap.

fish icon back to tip list


Tip: Mercury Qguard Extended Warranty - I'll relate my recent experience with Qguard extended warranty on my '99 Merc 225 EFI during year two...

Day 1 - Mechanic determines a ring let go in #5 cylinder. He calls Qguard and the powerhead tech is unavailable. I call Qguard.

Day 2 - Qguard tech returns mechanics call. Replacement powerhead reserved at plant and prepared for shipment.

Day 3-6 - Powerhead en route on truck thru frozen north. Mechanic removes damaged powerhead, inspects further, observes #5 ring appears to catch exhaust port, cracking piston, communicates with Qguard.

Day 7 - Mechanic receives powerhead.

Day 8-17 - Local mercury dealer closed for Christmas and New Year holidays.

Day 18-19 - Mechanic takes external parts off old powerhead, adds external parts to new power head, replaces powerhead, tests motor, determines idle motor temperature low related to a poppet valve spring.

Day 20 - Mechanic contacts Qguard, spring shipped from Texas warehouse, returns old powerhead to Qguard. I pick up motor for first hour break-in procedure, and garage boat for predicted local freeze, re-pack boat for upcoming tournament.

Day 21-24 - Await valve spring.

Day 25 - Return boat to mechanic, poppet valve spring replaced, motor tested, take motor home.

Day 26 - Travel to tournament practice, continue 30 gallon 25:1 oil mix in gas tank in addition to injection oil for break-in. Talk about smoke.

If you extract the holidays, the Qguard major repair of the motor block and heads was smooth delayed only slightly by shipment of parts. The mechanic scheduled work to accommodate shipment timetables and insure best throughput. I had the boat re-packed and ready for my next tournament. The local dealer communicated a supportive experience with Qguard for the warranty transactions. There was a $25 deductible.

I hesitated to purchase extended warranty past year one because of cost and the Merc 225 EFI had a reliable reputation. But, I decided I needed the piece of mind and pursued Qguard based on recommendations and positive experiences of friends. Looks like a very good decision now.

fish icon back to tip list


photo Mercury block with head removed 

above - Mercury disassembled,
with heads removed from powerhead,
revealing bottom #5 cylinder cracked
at ring and port

photo Mercury cylinder head 

above - cylinder head showing
where pieces of ring and piston
notched the head and
closed gap on spark plug
so it wouldn't fire


Tip/Troubleshoot: Trailer welds - While applying the annual wax job on my Triton trailer (MFI), I noticed rust stains where supports from outside guide bunks are welded to the top of the trailer's tube frame. Closer inspection revealed weaknesses at those welds.

More... I removed the plastic plug on the end of the trailer frame and looked inside one of the tubes from the back. An affected area could also be seen from the inside at the nearest weld. With slight pressure, braces flexed in rusted areas.

The trailer was less than two years old, so I called my Triton dealer to determine if it was still under warranty.


Update - I heard back from my dealer's warranty rep, Gerald Bates. He talked with Raymond Coffey at MFI who immediately offered a repair kit for this problem. He shared that they weld braces on the side now for strength and less vibration.

More... I talked with Raymond too when Gerald said it may be a simple bolt-on solution. Raymond confirmed it was a bolt-on solution but also required metal cutting, grinding, drilling and painting to prep the old area, then it was a bolt-on operation. I don't have the tools for that, so I had him ship the kit to my dealer.

Gerald called Tuesday to tell me the kit arrived. I took my boat in Wednesday, and Mike had it ready Thursday. Witt Marine service tech, Mike VanNatta, came through again! He handled the cutting, grinding, and painting to remove the weakened braces, then drilled three holes on each side and attached the kit components.

The quality repair kit from MFI is pre-cut to fit the frame including the cross-member and includes stainless steel bolts. Between Triton dealer (Witt Marine) and MFI representative (Raymond Coffey), this is marine customer service that renders confidence and satisfaction!

fish icon back to tip list

photo - rust appearing at trailer weld

above - rust forming at trailer weld

photo looking up inside trailer tube

above - looking up at weld area inside back trailer tube

photo - view from outside with repair kit installed

above - outside view of repair kit installed

photo - view from inside with brace repair kit installed

above - inside view of repair kit installed


(remember, click any image for larger view)


photo broken cup holder 

above - empty holes where cup holders normally rest in cap

photo replacement cup holder 

above - new white holders beside partly and completely broken black holders

Tip/Troubleshoot: Cup Holders - For some reason, the cup holders on either side of my ice chest cracked inside at the point where they fit tightly into the circular hole in the fiberglass.

I didn't use these often except as a place to hold little plastic containers of scents or attractants or an occasional stray crank bait.

I discovered this when one of them simply cracked completely around and dropped under the cap below the ice chest.


Update - I carefully removed the holder that was only partly cracked and hadn't fallen. My next dilemma was getting the old cup holder out that was rattling around down under the cap. Fortunately, there was nothing in it when it disappeared. And, sometimes I could see it near the bottom of the ice chest.

I tried a hooked wire unsuccessfully then a fetch tool but couldn't get a good grip with its pinchers. I was vacuuming the carpet when it dawned on me I could let the suction hose grab it. This got it to the cap hole at the top, where I could hook a wire into one of the cup holder's drain holes, then maneuver it around to get part of it through the tight fitting cap hole just enough to pull it back out with some effort.

My local Mercury marine dealer had some nice looking white cup holders for under $2. We put a small bead of 3M sealant around both and set them in. Looks nicer than the old black ones, and a simple and cheap enough fix that I didn't need to bother my Triton dealer down in Baytown.

fish icon back to tip list


Tip/Troubleshoot: Bow Depth-Finder Interference - I have a MotorGuide trolling motor (TM) and Lowrance depth finder (DF) on the bow. The TM uses a pulse modulation feature to control speed and extend battery life. When I activate the TM, the DF screen fills with lines or blotches of pixels.

When I asked TM and DF representatives about this, both agreed that it was radio frequency inferference (RFI). Neither agreed that it was their responsibility to fix this notorious problem caused when their products are commonly used together.

Update - I received several suggestions from multiple sources to address minimizing the RFI effect. I was told to try them at my own risk.

One was to reroute the transducer wire so that it's less close to the TM steering head and away from the TM power cables. Often, a transducer wire is installed up past the head and along the TM power cable like mine was so it doesn't get pinched. Rerouting this wire along the GatorMount arm had the greatest impact on my interference.

Another was to isolate the transducer fastened with a ring clamp on the TM. I used cut up strips of tire inner tube so the transducer and clamp were somewhat shielded from the TM lower unit.

Another was to common ground (with fuse) the negative used by my 24v TM and my 12v DF. I have two deep cycle batteries that power my TM, separate from a starting battery that powers my accessories like the DF. (I didn't need to worry about this common ground thing. My dealer previously installed and wired in a Perko two-battery switch for emergency starting. The service tech told me that my starting battery and my second deep cycle battery share a common ground as a result of that set up.) I do not advise trying a common ground suggestion unless you completely understand your boat's electronics and power. For example, this suggestion would create a short for 36v or 12/24v set ups that include the starting battery for higher TM power (mine does not). And, it was important in my case that it was the negative of the one deep cycle battery that constitutes the negative of my 24v circuit.

fish icon back to tip list

photo of troll motor with alternate wire path 

above - new wire path down arm, careful not to pinch


photo old vs new transducer wire path 

above - old (x) vs new transducer wire path

(click either image to see comments and detail)


 picture - trailer hub barake axle

above - trailer hub brake axle

 picture - trailer hub non-brake axle

above - trailer hub non-brake axle

 picture - grease splattered on inside of wheel rim

above - grease splattered on inside wheel rim


Tip/Troubleshoot: Trailer Bearing Seals - I noticed splattered grease on the inside rims of my trailer wheels. Inspection revealed grease leaking from the inside seals.

They almost made it three years. MFP trailer suggested I contact the manufacturer of the hub, UFP, to get warranty replacements, and in turn UFP told me to contact their warehouse supplier.

I knew these types of buddy-bearing grease-cap hubs have special rear seals with two lips, one facing inward to keep the grease in and the other facing outward to keep water and debris out. They told me they carried two types, one better than the other, and I said I needed the original quality part and supplied the part numbers from my original UFP literature.

UFP's supplier sent me the seals but I had to pay for the replacements and shipping, so I'm still confused about how or if UFP's five year parts warranty covers this (says parts and not labor).


(continued below)

 picture - grease leaking past inside seal

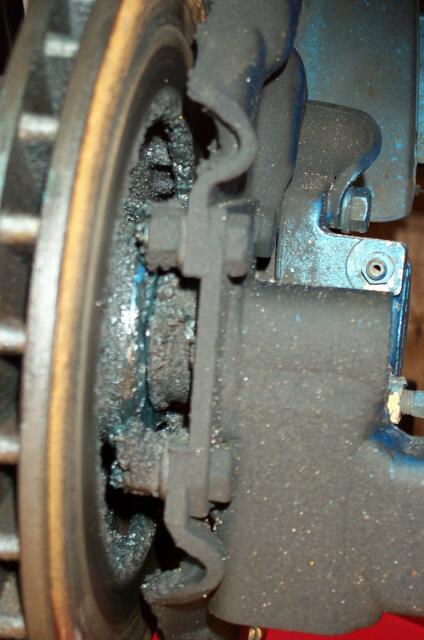
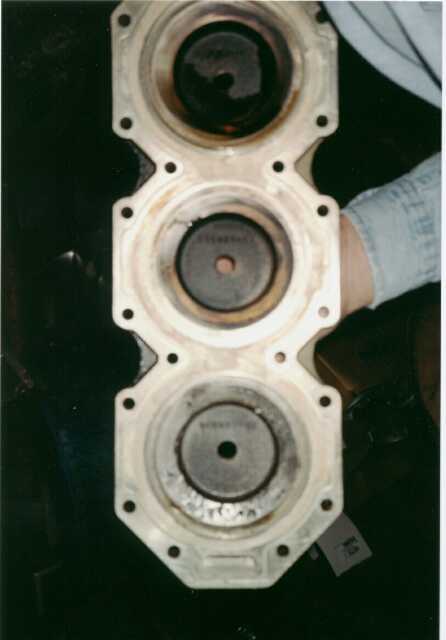
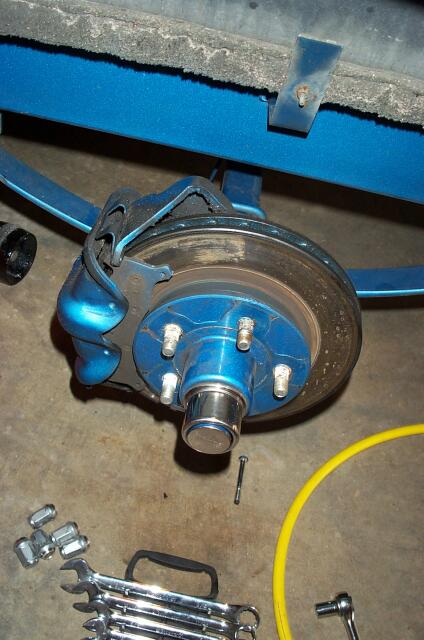
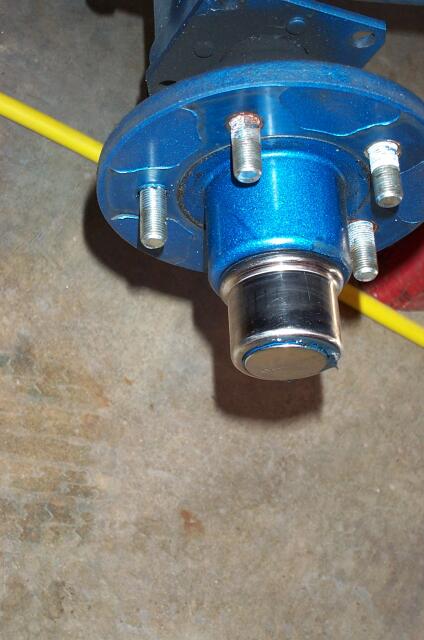
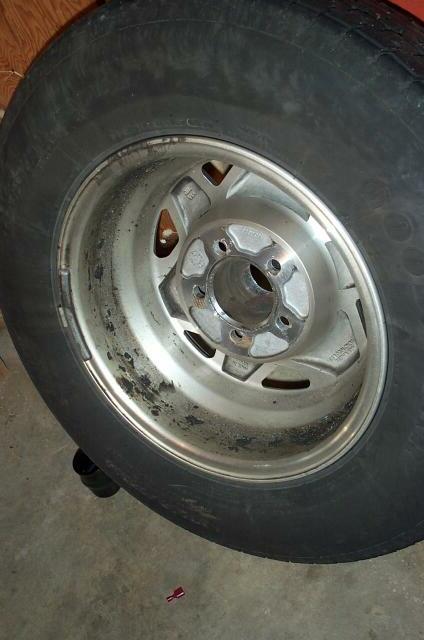
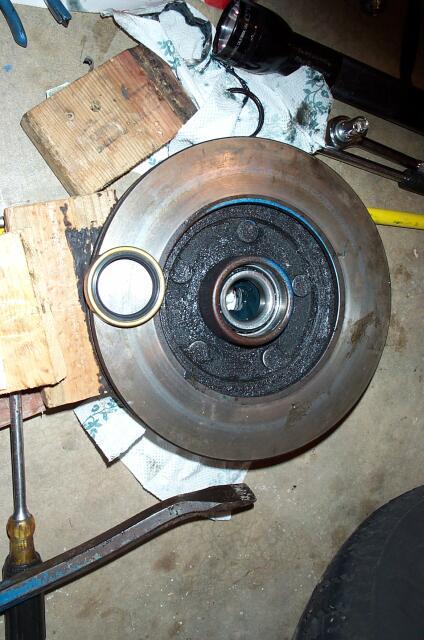
above - grease leaking past inside seal

 picture - hub removed

above - hub removed

 picture - old seal out, new seal ready to go on

above - old seal out, new seal ready to put into hub after cleaning

Tip/Troubleshoot: Trailer Bearing Seals (continued) -

With the warranty on my UFP literature plainly stating labor not covered, I began the job myself and a mechanic friend helped me... take off the wheels, undo the brake caliper enough to move it out of the way, take the hub and brake rotor off the spindle, clean up the greasy parts, remove the leaking rear seal from the hub, press in the replacement seal with some lock-tite stuff, regrease, reassemble, and tighten any parts according to original UFP instructions that came with my MFP trailer.

The hardest steps, in my opinion, were cleaning up the old grease or seal surfaces and removing the old seal. I read that you will destroy a rear seal trying to disengage it from the hub, and that was so true.

I have a tandem axle trailer, so I had to do the same steps on the front axle, but didn't have the brake components to deal with there.


Update - I'll write more later if I'm reimbursed under UFP warranty.


fish icon back to tip list


Fixing My "Spun" Trophy Prop - I "spun a hub" on my Mercury Trophy prop over at Falcon lake on the Mexico border. It's only the second time in my forty years of boat driving. Fortunately, my newer Trophy has the Mercury Flo-Torq II style hub with easy to replace sleeves.

This style hub has two separate sleeve parts, and one can likely be reused. The two parts may appear as one because they are snapped together. Each is about $16 so don't overlook and discard the second sleeve part with the worn part.

Typical outboard props have a rubber or carbon plastic sleeve between the prop shaft and the prop. It's designed to fit tight, engaging the prop, and yet give a bit if the prop hits something, yielding just enough to spare the lower unit and drive train from the sudden shock.

A "spun" hub is one where the sleeve no longer fits tightly and slippage allows the prop shaft to spin at a different rate than the prop. This looseness may be due to age, striking objects, or stressful effects of the prop leaving and reentering the water in wave chop. The condition may manifest under the prop loads of accelerating or decelerating.

Slipping one way, it's difficult to apply power and get the boat on plane. The motor revs up but the prop slips and doesn't push. This is how most people discover the condition. You may smell a hint of burnt rubber when you tilt the motor to inspect the prop. Boats may be able to simply idle along with a prop not badly "spun" and creep to a safe destination.

Slipping the other way, the prop can continue to turn at its current speed although the motor has slowed. There's no prop drag in the water. In effect, your boat continues to skim along at pretty much the same speed for a good while. Going fast when you spin your hub? This can be the worst way to discover the condition. Think about that, it's like having a motor throttle stick at wide-open for ten to twenty seconds after you let off.

above - "spun" drive sleeve removed from hub along with the metal insert that slides inside it and onto spline shaft

 image - replacement drive sleeve insert

above - replacement drive sleeve, Mercury Marine part 835290A

 image - another part fits into the sleeve to stabilize one end

above - another part fits into the sleeve to stabilize the end toward the lower unit and thrust washer

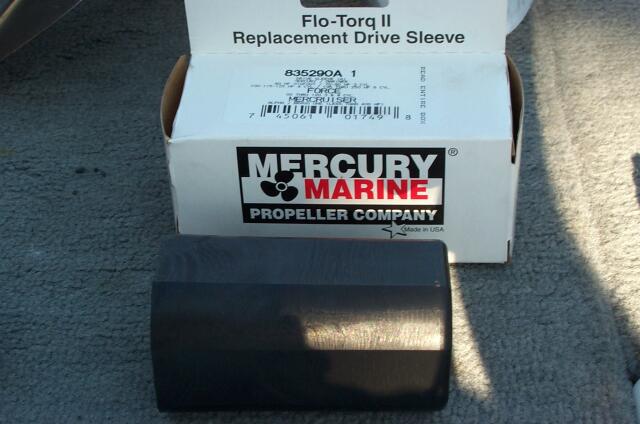
 On my older Yamaha Pro spare prop, the round rubber sleeve and metal spline insert are both pressed into the prop. This type needs professional service. Most of my props were this type until I got this Trophy.

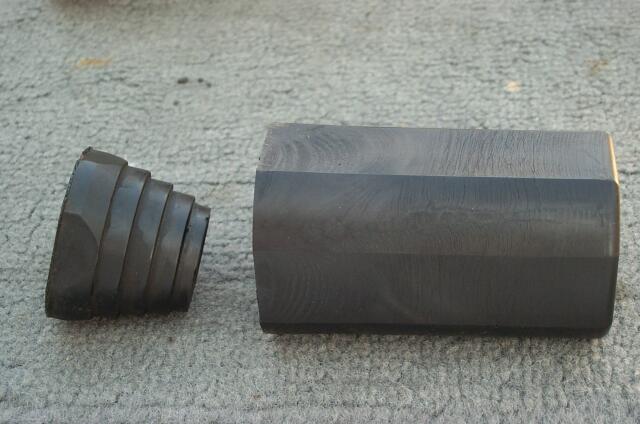
On my newer Mercury Trophy prop, the sleeve has squared edges matching the prop hub and the metal insert. This type can be replaced by the owner.

Free the lock washer, then loosen and remove the prop nut and lock washer. Take the prop and thrust washer off the lower unit drive shaft. Take the metal insert that rides on the splines out of the sleeve.

Tap to free the "spun" sleeve from the prop using a wood or plastic handle so you don't damage the prop or the second sleeve part that's probably still good. Separate the two sleeve parts.

Reassemble, replacing any worn parts. Put some grease on the splines, place the thrust washer then reassembled prop back onto the shaft, and tighten to specs in your user guide. Engage the lock washer. Check tightness for spec again after twenty hours.


fish icon back to tip list

 image - new replacement sleeve next to old spun sleeve

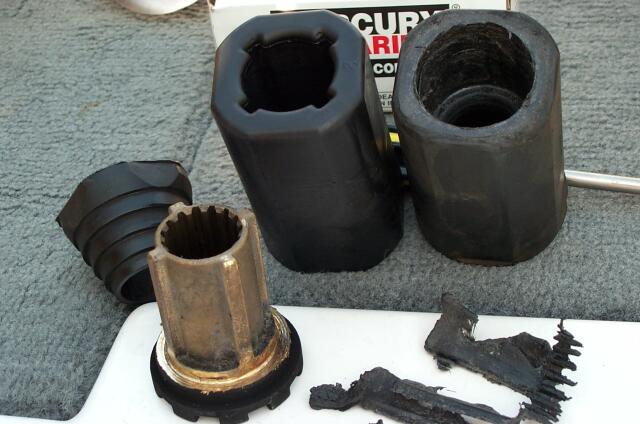
above - new replacement sleeve left next to old "spun" sleeve right, notice how the inside was rounded out by the metal insert.


above - squared hub hole on prop where sleeve slides in

 image - parts shown in relative locations

above - parts shown in relative locations


Return to Rip's Triton Tips main page.

Also consider exploring BBC Home Page for Bryan Bass Club information and links to other bass fishing/boating sites.


Ray's Triton Page | Buying Adventure | Area Dealers | Rip's Triton Tips | Other Links | BBC | Ripstips Home

For corrections on this page series, please contact Ray Rippstein at r-rippstein@tamu.edu

Thanks for visiting.

This intro page last updated July 3, 2006